Automation
- How to filter and export your products list on Shopify
- Step 1: Open product listStep 2: Click FilterStep 3: Select filter conditionStep 4: Select value tagged with productStep 5: Click Add filterHow to export your products list on Shopify
-
In the case, you have a long product list which you only want to change some of your goods but not all of them, how can you do it? You can add a filter to shorten the list in your CSV file which which makes things easier for you rather than dealing with your entire list.
Below is the writing that demonstrates How to filter and export your products list on Shopify.
How to filter and export your products list on Shopify
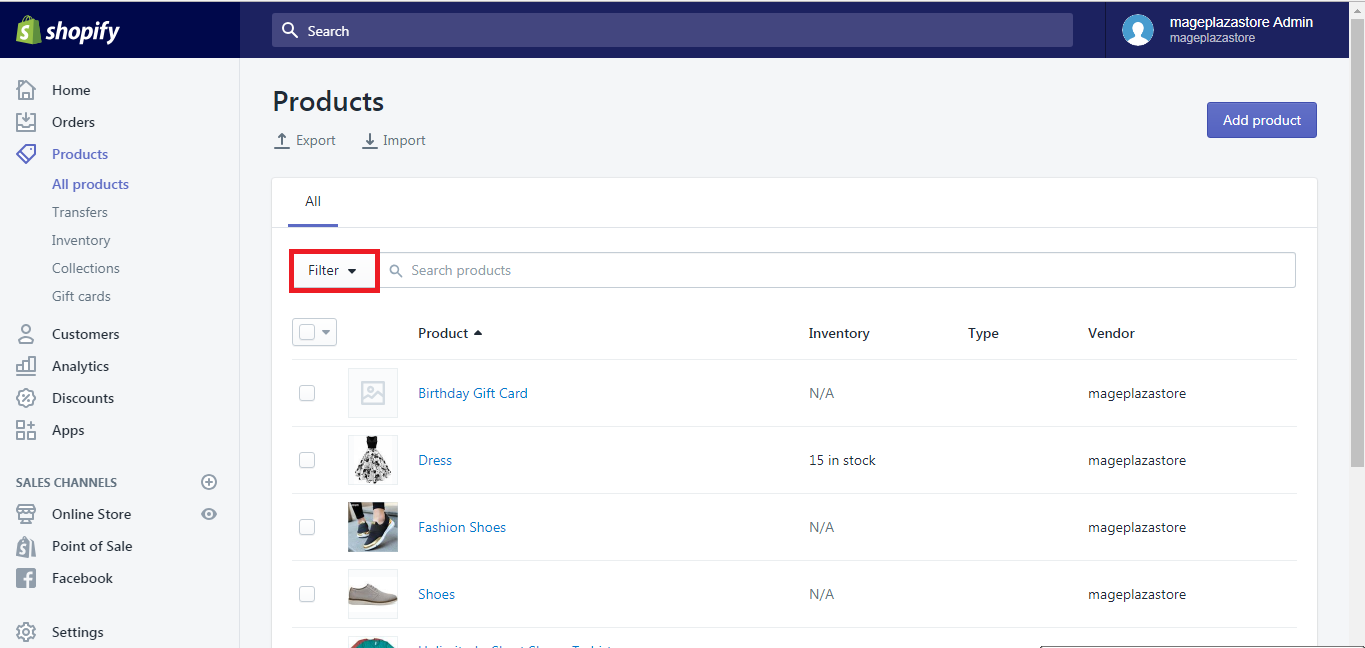
Step 1: Open product list
On the left-hand side of the admin screen of Shopify, go to
Product.
Step 2: Click Filter
On the top of the page, hit
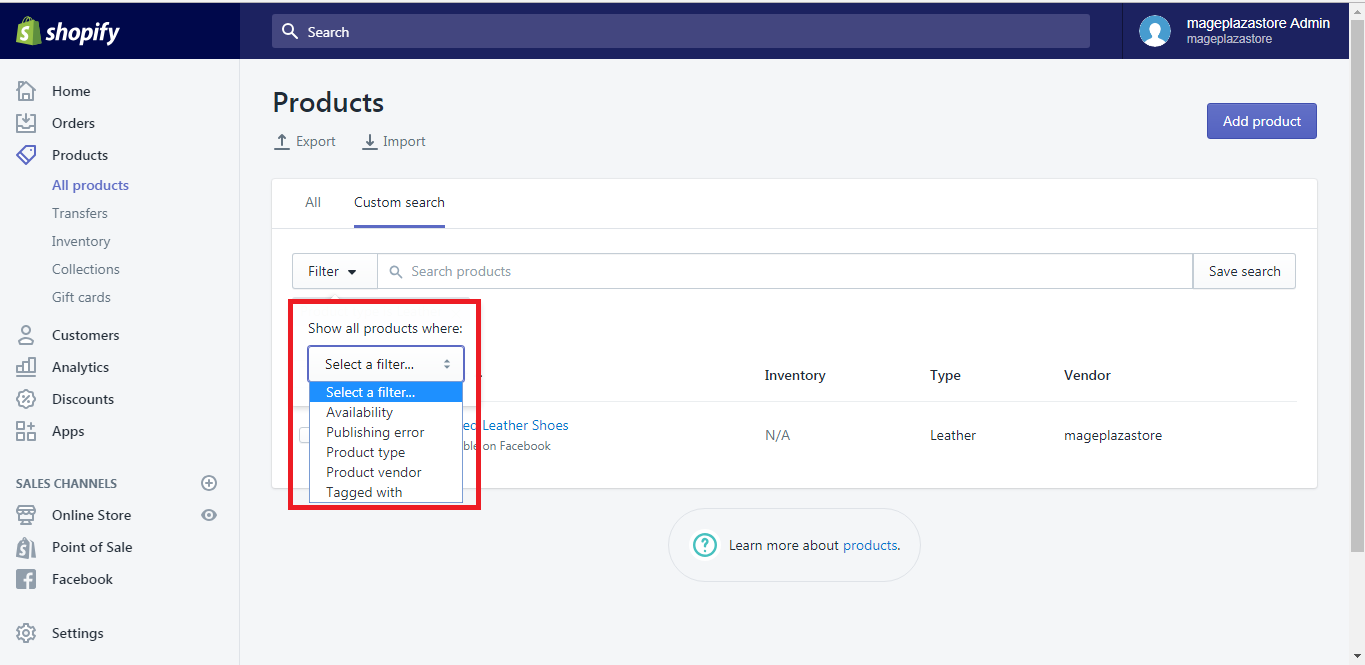
Filter.Step 3: Select filter condition
A small dialog box appears on the screen, you can select the filter in the menu
Show all product whereand your items will be classified into the following condition:Availability: demonstrate the number of products you have in stock
Publishing error: it will show the items that have publishing errors when you upload them from a different channel from Online Store
Product types: display the product in categories
Product vendor: show the suppliers of the commodities
Step 4: Select value tagged with product
Select the value tagged with your product in the box
select a value. For example, the goods will be displayed according to their availability on different channels like Facebook, online store and point of sales.Step 5: Click Add filter
Hit
Add filter, the screen will display the commodities that satisfied your condition and tagged values.How to export your products list on Shopify
- Step 1: Click Export
- Step 2: Choose export option
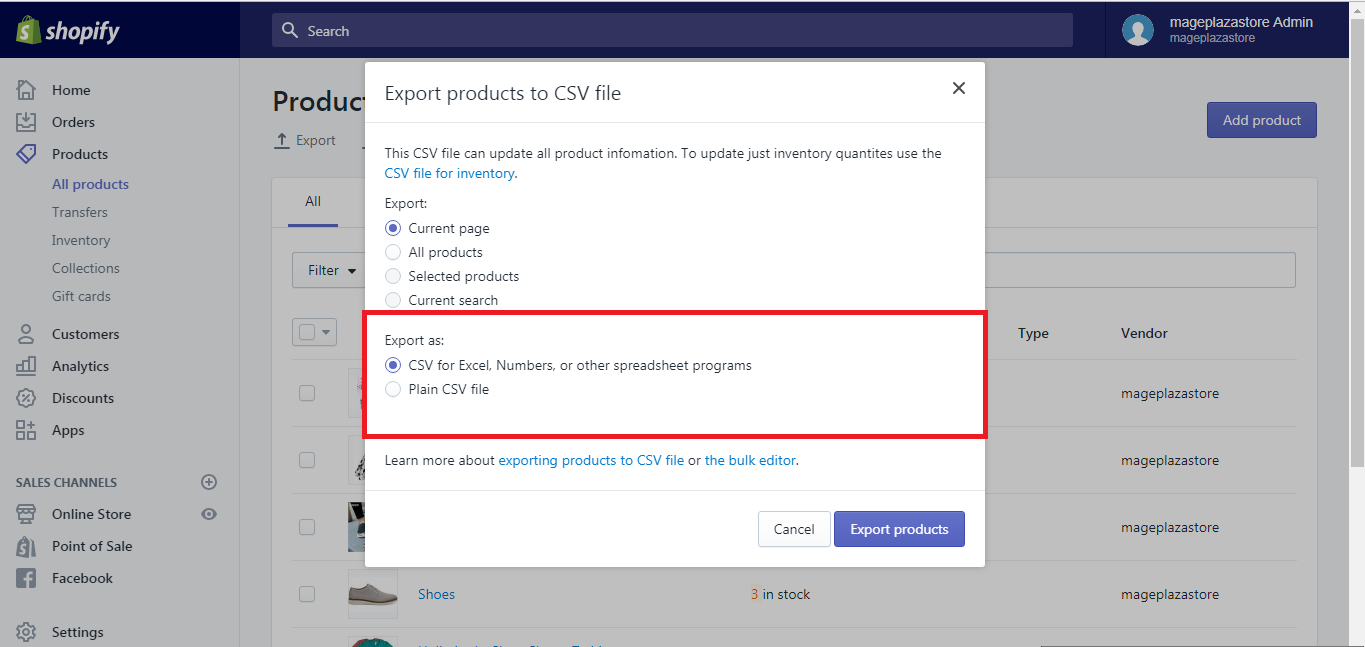
- Step 3: Choose export file
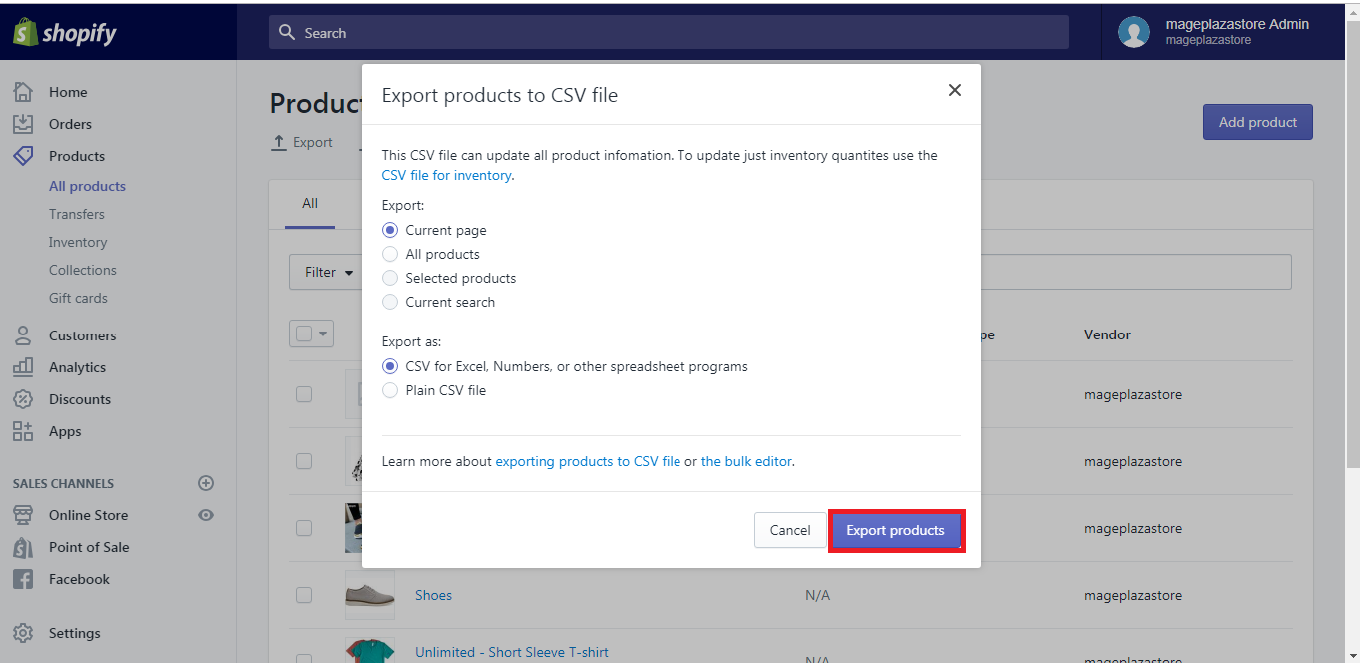
- Step 4: Export products list
After finishing adding your filter on your product list, we continue with how to export your product
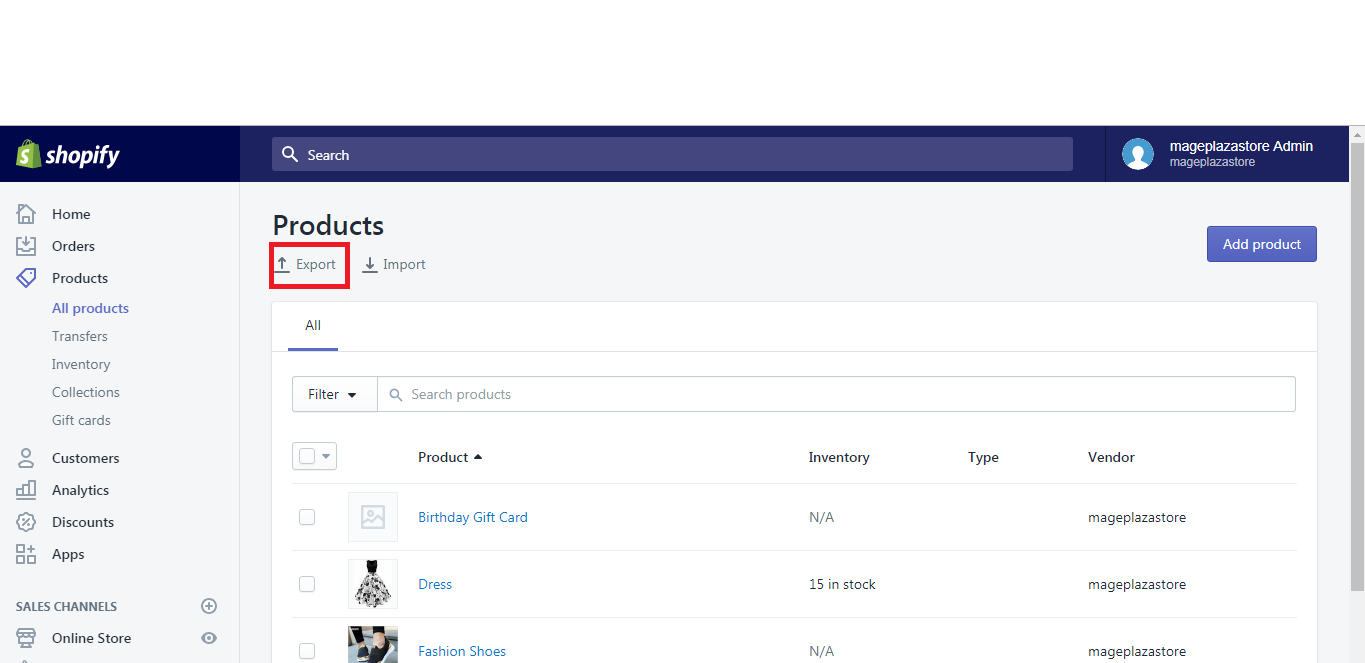
Step 1: Click Export
On the product page, click on the
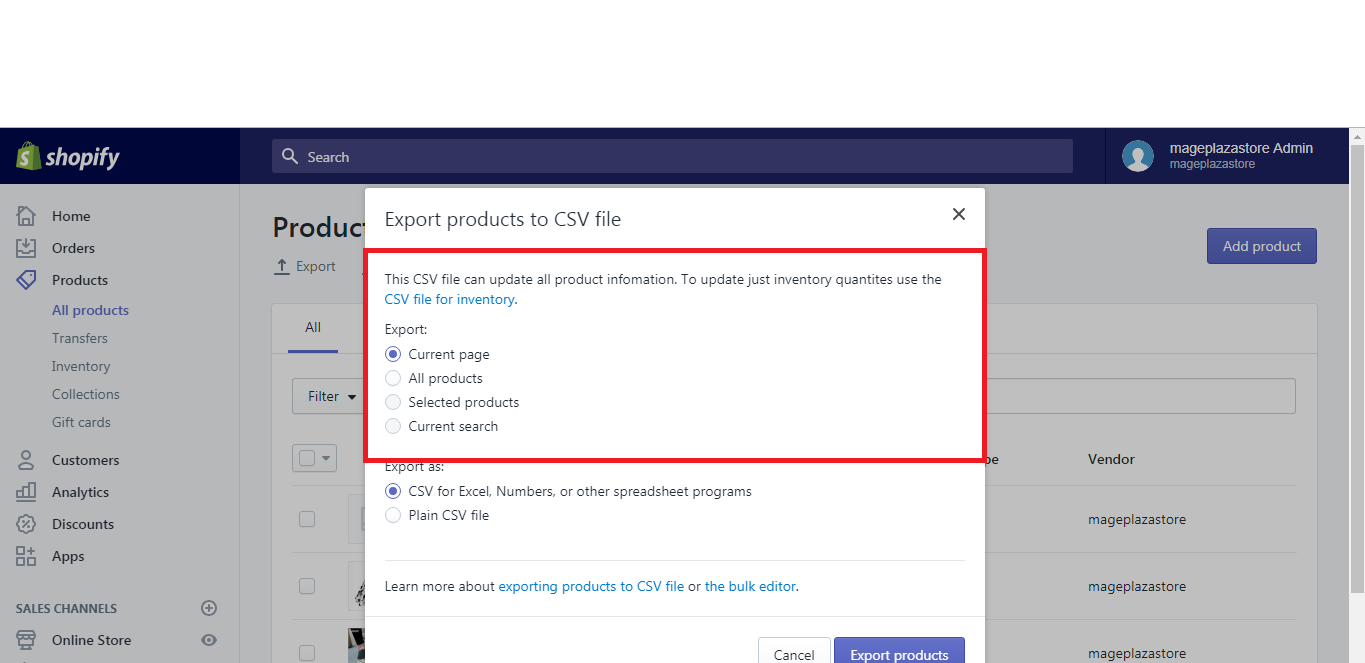
Exportbutton which has an upward arrow on the top of the page.Step 2: Choose export option
A dialog box will show up and ask what you would like to export. Remember to choose the option to export only the products matching your filter. The choice is either to export goods on your
current pageorn products matching search(n is the number of products)Step 3: Choose export file
Choosing the type of CSV file that you want for export.
I suggest you select
CSV file for Excel, Numbers, or another spreadsheet programif you want to use a spreadsheet program to adjust your CSV file. If you plan on using a plain-text editor, please chooseplain CSV file.Step 4: Export products list
Please click on the
Exportproducts button, a notification will show up to inform you the number of products and a CSV file will be downloaded to your computer or emailed to you.If you export 50 commodities and below (one page), the CSV file will be downloaded by your browser. For 51 and more( more than one page), the CSV file will be sent to you and the owner of the account.
After making any changes, you can import the edited version of your CSV back to Shopify.
Conclusion
This writing is a basic guide for you on How to filter and export your products list on Shopify. I hope you have a great time reading and applying this guideline while running your shop, and if you want more similar posts like this one, check out our Shopify Tutorials.
Related Posts:
Sam Nguyen is the CEO and founder of Avada Commerce, an e-commerce solution provider headquartered in Singapore. He is an expert on the Shopify e-commerce platform for online stores and retail point-of-sale systems. Sam loves talking about e-commerce and he aims to help over a million online businesses grow and thrive.
Related Post
-
Table of Contents